Cameras are more and more complicated and we are tempted to play with all the buttons. But sometimes less is more or at least there are a few basic rules we should try to stick to in order to get the best images possible. In this article we have selected 10 tips that we suggest you follow to optimize your camera (and time!).
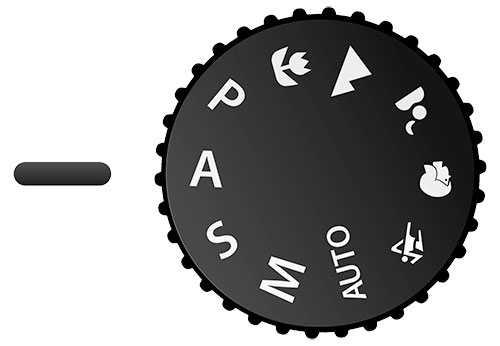
Choose the Aperture-priority mode
No need to change all the time the exposure mode. We recommend that you choose the Aperture Priority Auto (or A) and that you stick to it. In this configuration you choose the aperture and the camera selects automatically the appropriate shutter speed. You can play with depth of field while adjusting aperture. As a reminder, small aperture (high f numbers, like f/36) increase depth of field meaning the subjects in the background and in the foreground are in focus. If you want to focus on a specific subject and want the rest to be blurry choose a small number, the smaller the better depending on your equipment.
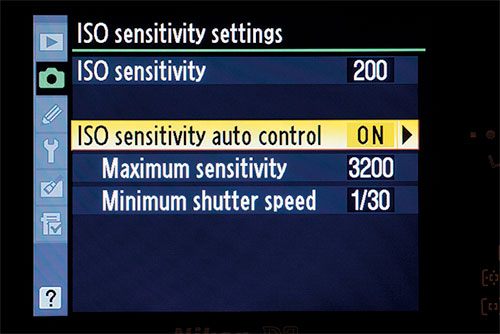
Auto ISO or 400
ISO sensitivity is the digital equivalent of film speed. The higher the ISO sensitivity, the less light is needed to take a photograph. With films, exposure is controlled by aperture and shutter speed settings only because the ISO is already chosen by your film. With Digital cameras you can choose several settings but we suggest that you stick either to Auto or 400 ISO.
Auto ISO is the easiest choice, the ISO sensitivity will be automatically adjusted by the camera. It is useful when your lightning conditions change all the time. The quality of camera's have so much improved that it can be a reasonable choice.
400 ISO might be the best solution if you prefer to stay in control. 400 ISO is the film standard and covers nearly 90% of our photographic needs. You won't the see the quality difference between an image shot at 100 ISO and 400 ISO and you will still be able to play with depth and motion blur.
White Balance Auto
White balance ensures that colors in general and white in particular are unaffected by the color of the light source and that they are rendered as you see them. We recommend that you choose Auto White Balance. It is usually good with most light sources. The color temperature is adjusted from 3,500 to 7,000 K which covers a wide range of possibilities. Fine tuning white balance is often complicated.
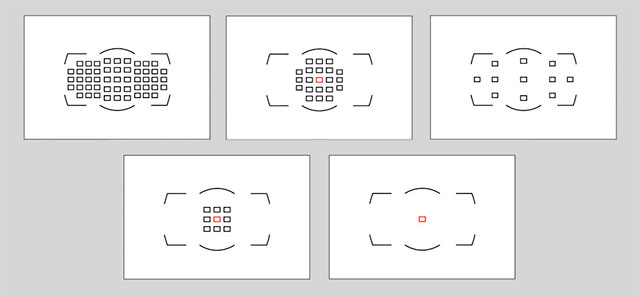
One focus point
If you are not a professional specialized in sports or wild life, choose the single point focus or central focus. You might have to change frequently the composition of your image but it will become quickly a reflex. You just need a little practice. Focus on your main subject that you will put in the center of your composition and when the focus is done change your composition while keeping your settings (usually by keeping your finger half way on the shutter-release button).
RAW or JPEG?
Is one format superior to the other? Yes. JPEGs are not as good as RAWs. RAW being a better file format does it mean that you should only choose RAW. No
In fact it depends of what you want to do with your images.
If you are a professional photographer RAW files are the best choice because it allows you to shoot quickly and to keep enough information to fix possible exposure issues in post production.
If you need post production flexibility but also the ability to immediately use the files to show them to a client, can you use the NEF(RAW)+JPEG option on your camera so that you can have the best of both settings. Just keep in mind that in this case your memory card will need to be bigger.
If you take images or your family or vacations, JPEGs are perfect. Even if you want to make some corrections you don't need all the capabilities RAW offer.
If you take images for the web, JPEG will be more than enough.
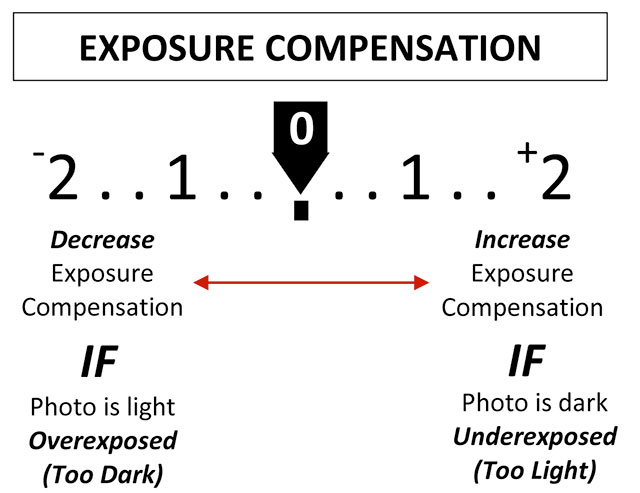
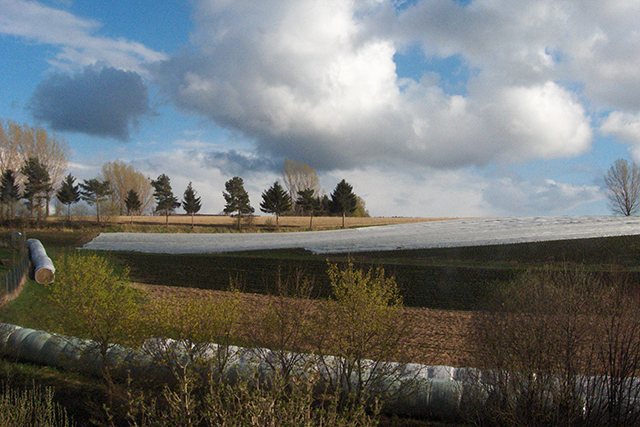
Use one-stop underexposed
- Underexposed = darker image in terms of how bright it is. Think about being in a dark hallway and trying to see the details of what is around you.
When your camera's meter is showing a value towards the left side of the scale, it's telling you that the image is going to be underexposed (dark). Depending on the scene, you may want to dial in a small amount of underexposure (SMALL, don't overdo it) to create a darker tone or mood to your image.
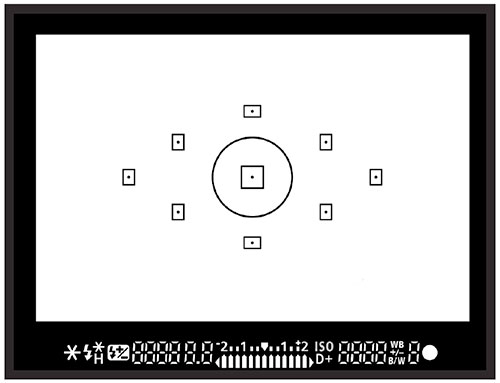
Customize your viewfinder
Take time to read your camera's user manual. Too often we tend to think that we know everything but it is always when we don't have time to take a look at the manual that we have a problem.
Before shooting, check if the display of your camera is in focus. Focus points and AF area display should be in focus for your personal vision.
Then don't hesitate to remove from your viewfinder all the information you don't feel are necessary. You will still be able to find the information you removed from your viewfinder on your camera's menu.
Important information you should keep are: Iso sensitivity, shutter speed, aperture, exposure compensation but that's about it.
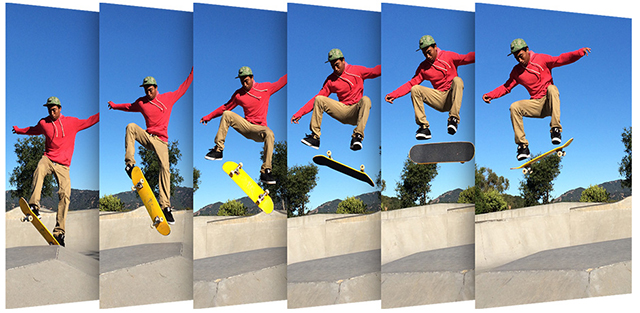
Avoid burst trigger mode
Unless you are at a sport event that requires a continuous high speed release mode, try to avoid it.
The decisive moment you want to immortalize will depend of your understanding of what is happening in front of you and the way you frame your image. If you don't control what you are doing completely you might be disappointed by the result. Take a few images but not 10 fps in a static frame.
It also takes a lot of time at editing to select the images that are all alike.
Keep the standard settings
Cameras can be complex. Sometimes we change setups and obtain an incredible effects. But if you want to be sure to have the best image possible, keep the standard settings and change your image with editing softwares in post production. If you change your settings you might not be able to remember what you previously did and might regret it.
keep it simple and spend some time when you have more time in front of your computer to correct your images or add effects, filters...
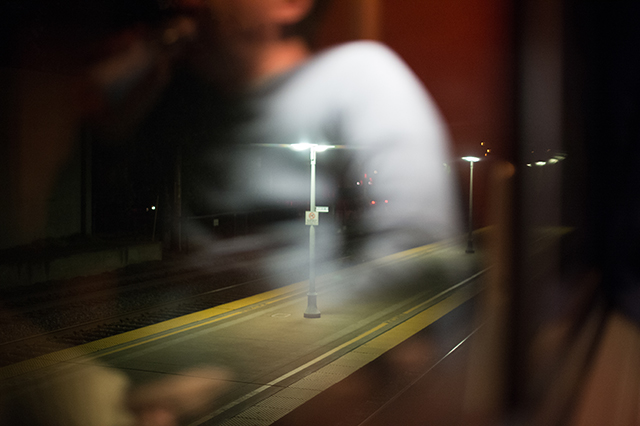
Use manual setting only if...
In manual mode you set everything yourself. It can be a huge advantage in some circumstances when you know what you are doing. The only thing is that it takes practice and time. You can use manual mode when the automatic corrections of your camera are annoying or preventing you from taking the image you have in mind.
For example at night or if you want to play with the shadows of electric lights. With the manual mode you can ask your camera to keep the aperture you want at the speed you want to obtain the atmosphere you have in mind.