Solarization is a phenomenon in photography in which the image recorded on a negative or on a photographic print is wholly or partially reversed in tone. Dark areas appear light or light areas appear dark.
The term is synonymous with the Sabattier effect when referring to negatives, but it is technically incorrect when used to refer to prints.
In other words:
- The correct term that should be used for the photographic effect involving exposure during development in the darkroom is the
Sabattier Effect or
Pseudo-Solarization. (wether on a negative or print)
- The term solarization should be used to describe the effect of tone reversal observed in cases of extreme overexposure of the photographic film while still in the camera.
But we tend to use the generic term solarization for both techniques.
Man Ray is one the most famous photographer to have shamelessly broken the golden rule of darkroom photography 'Do not turn on the light while in the darkroom'.
He would momentarily switch back on his studio lights while processing his films. A partial inversion of the image would then appear with dark areas becoming white.
Let's try to see how to proceed to replicate this technique using a computer and the softwares Lightroom and Photoshop.
First of all you need to use an image that has a lot of contrast. The background is black and the subject is bright which will allow us to obtain a better inversion for the dark contours.
If you file is in color, convert it to black and white/monochrome first
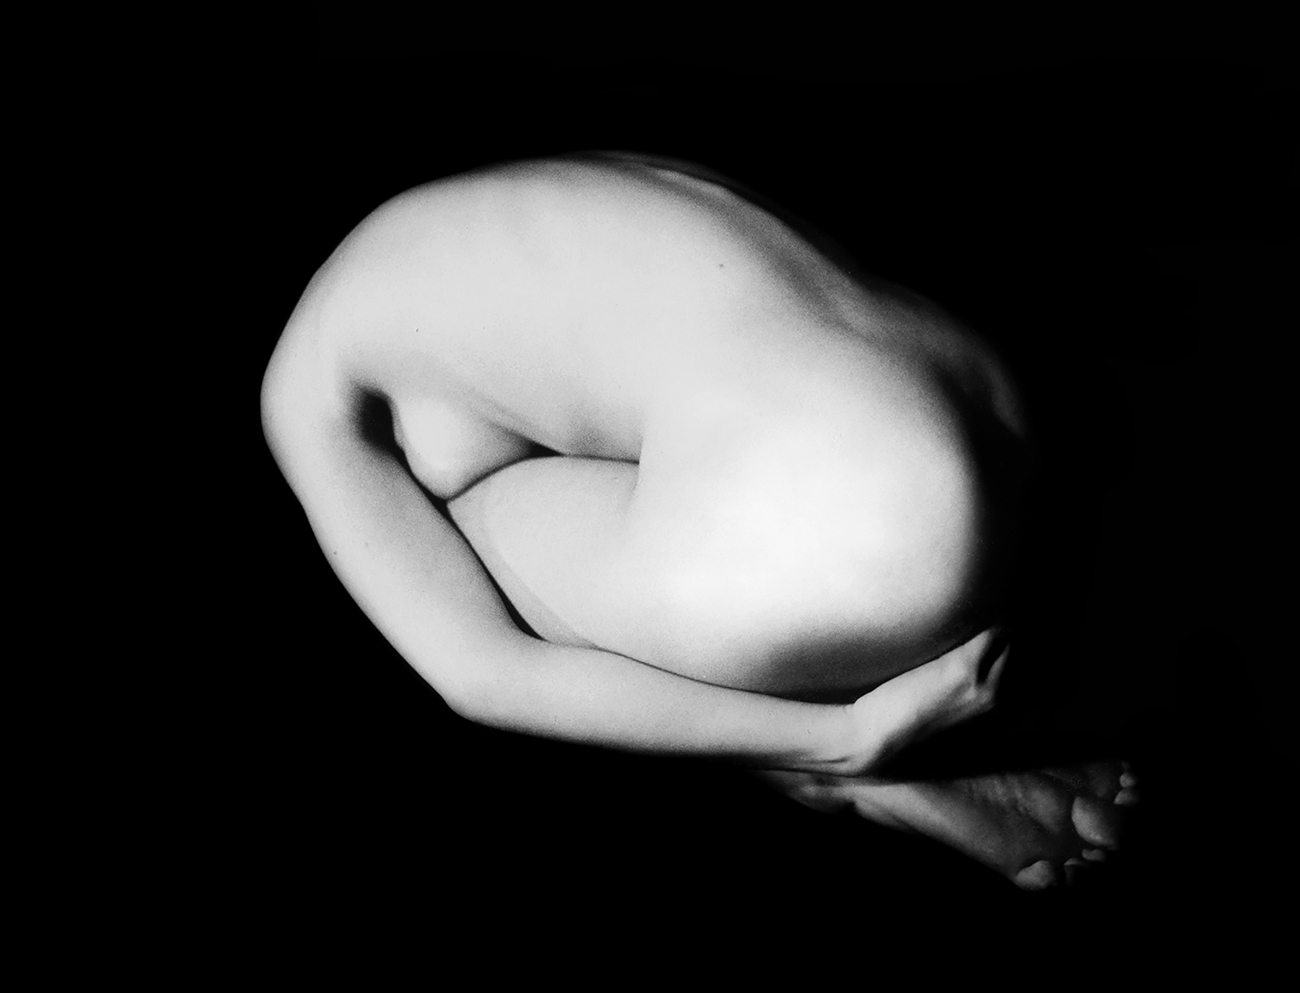
© Sandrine Hermand-Grisel
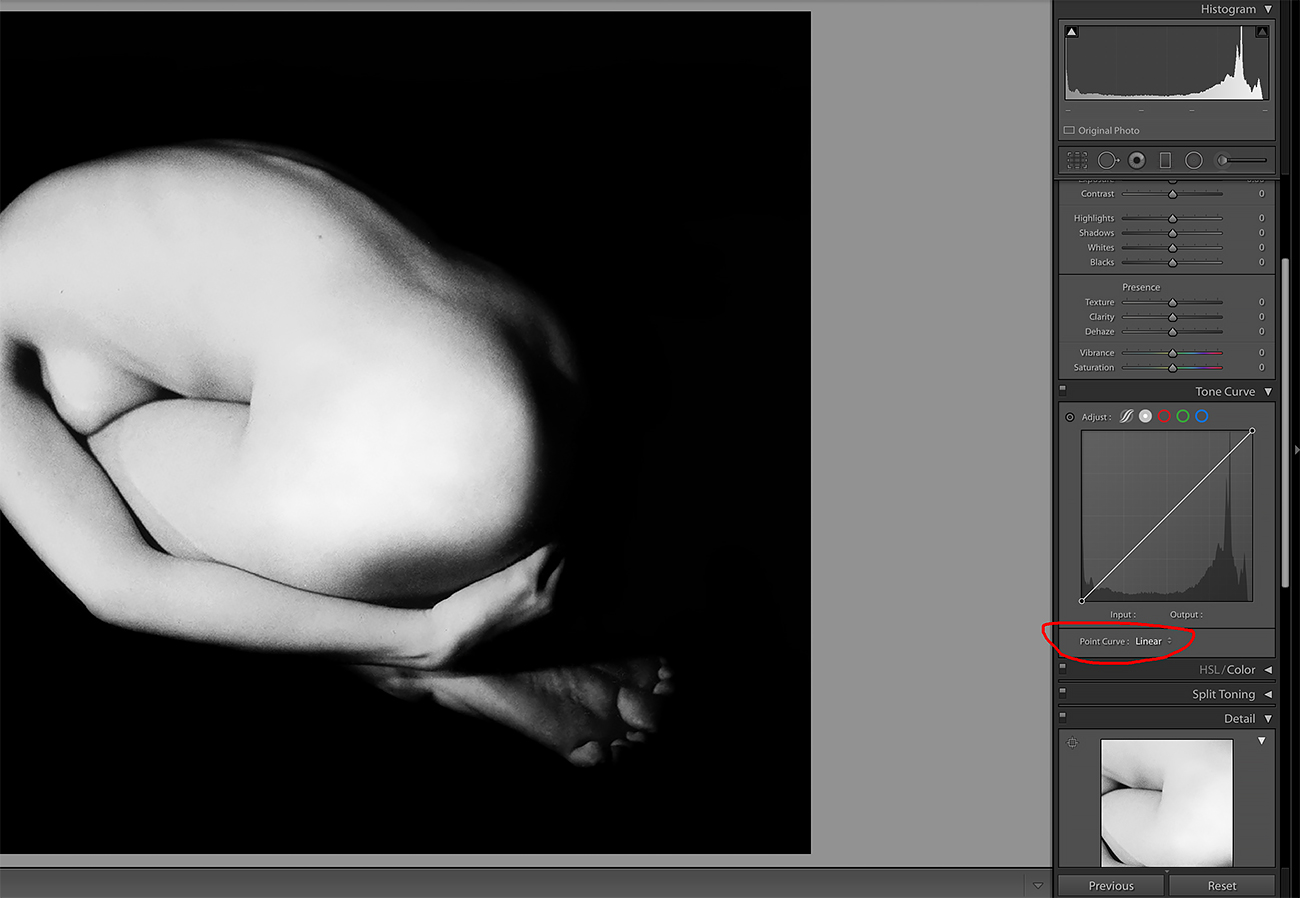
Use the Tone Curve Tool
1 - Select: Point Curve Linear
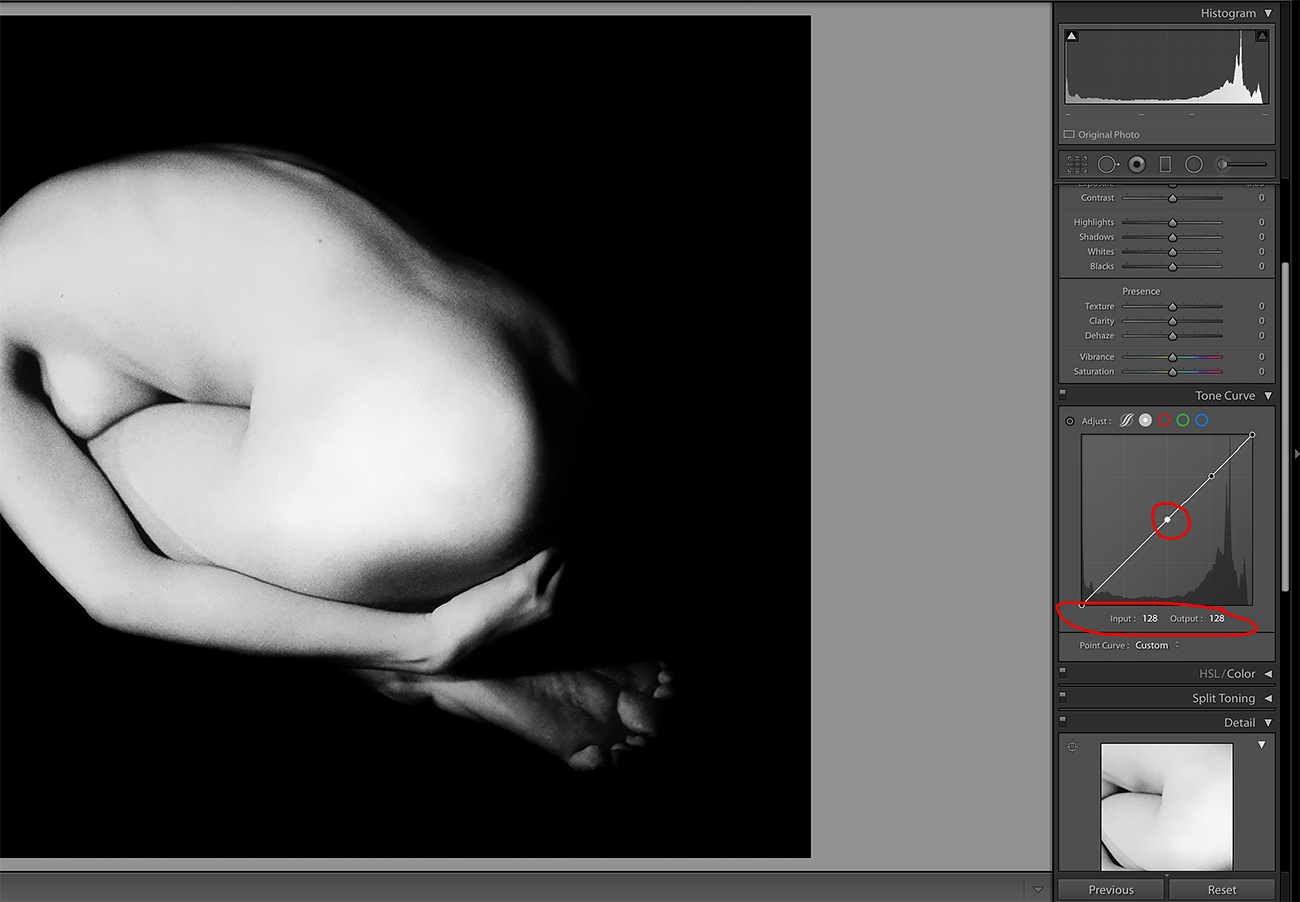
2 - Place a center point
With input and output values at 128 (medium gray)
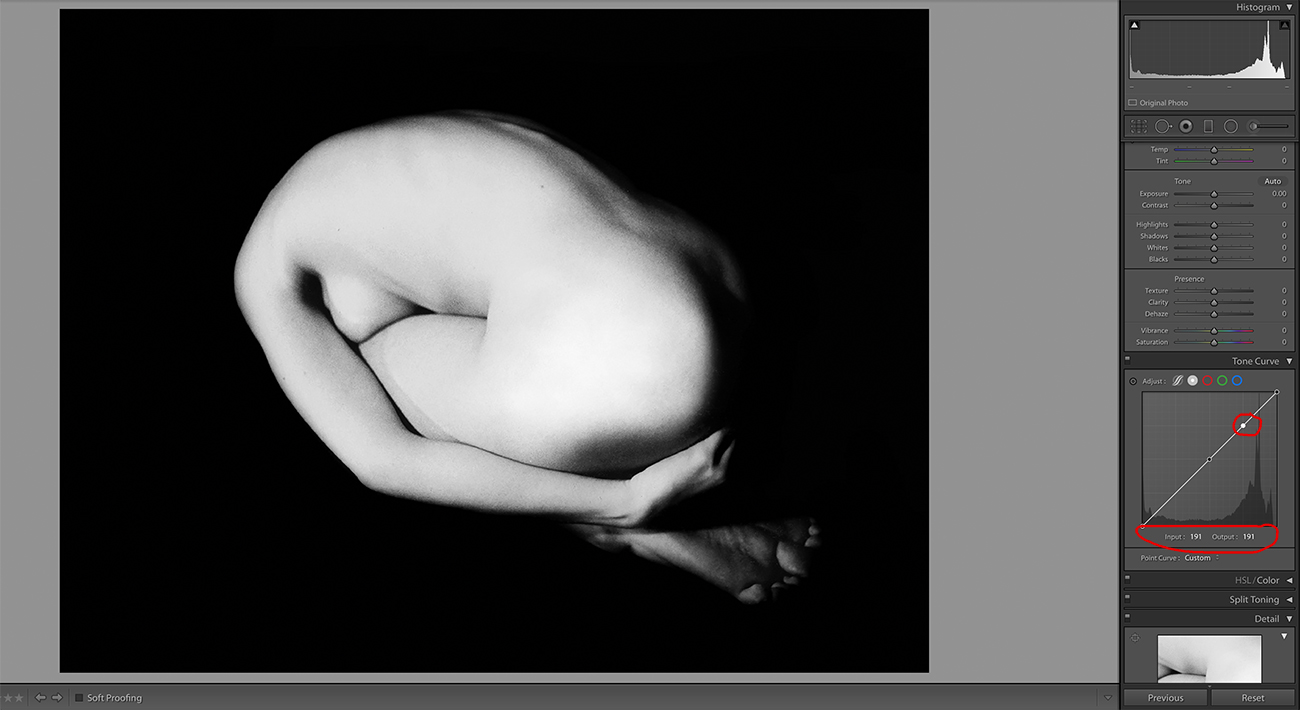
3 - Place a second point
With input and output values at 191 (light gray)
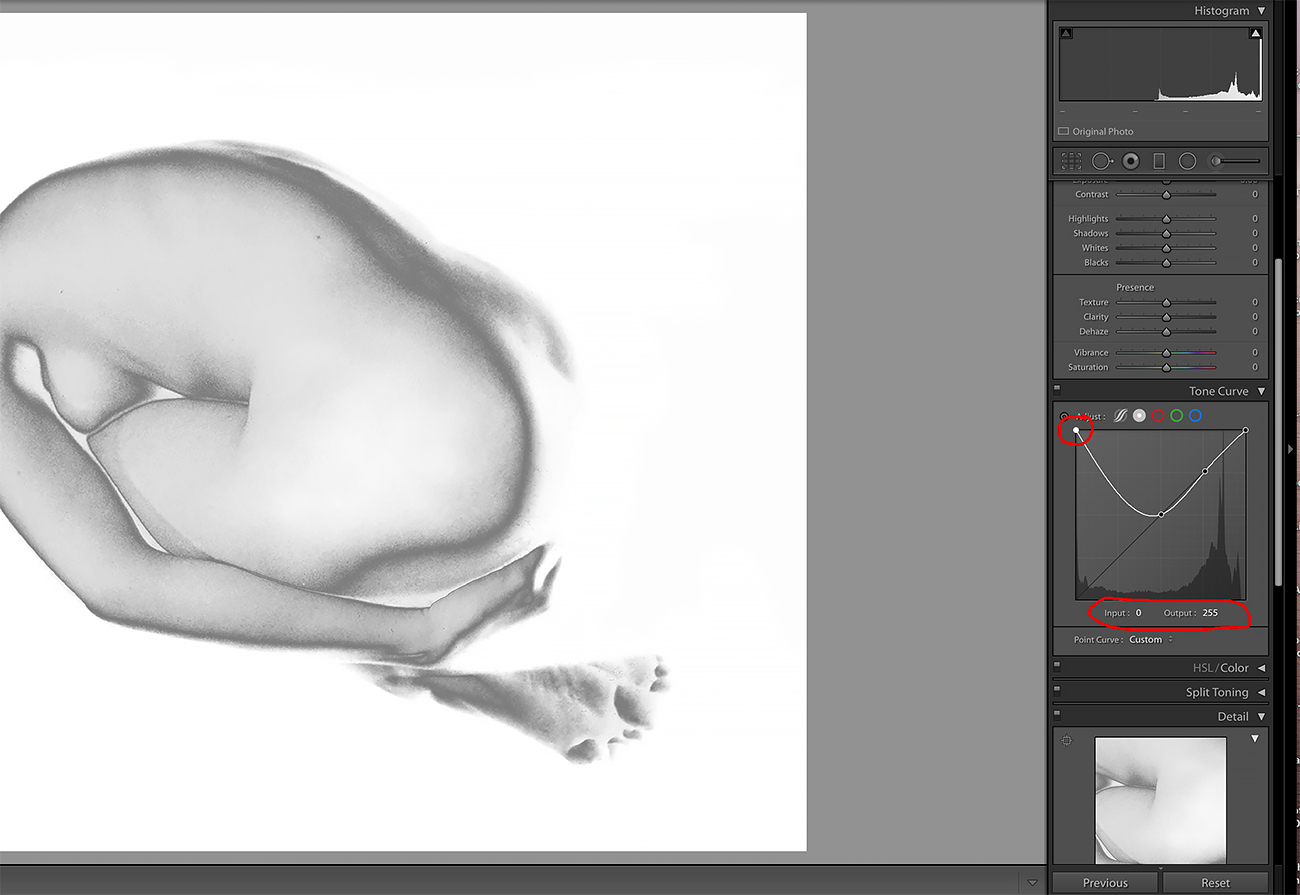
4 - Partial inversion
Put the black point curve (left point) at 0 (zero)
The input value becomes 0 and the output value 255
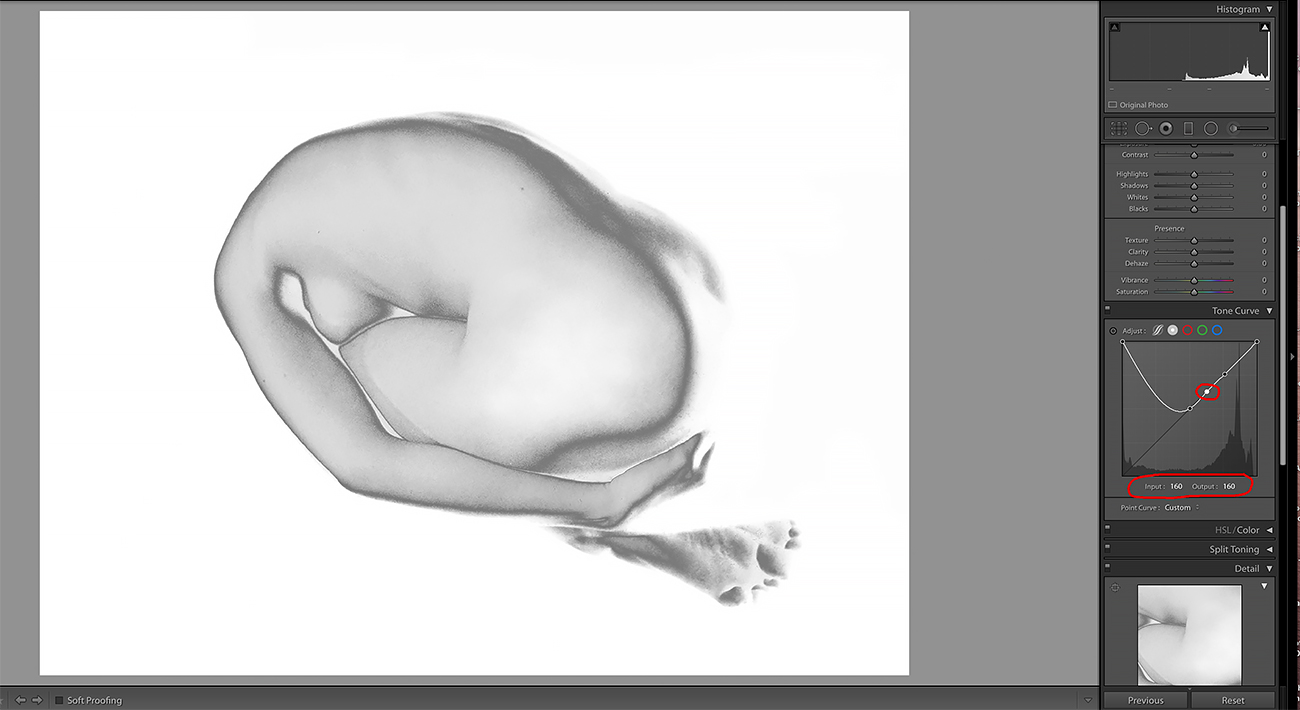
5 - Refine the curve
The first step of the solarization is done. You can now try to make your image more appealing for choosing a slightly different value between our 2 points 128 and 191. In the example bellow we created a new curve point at 160.
6 - Play with the tools
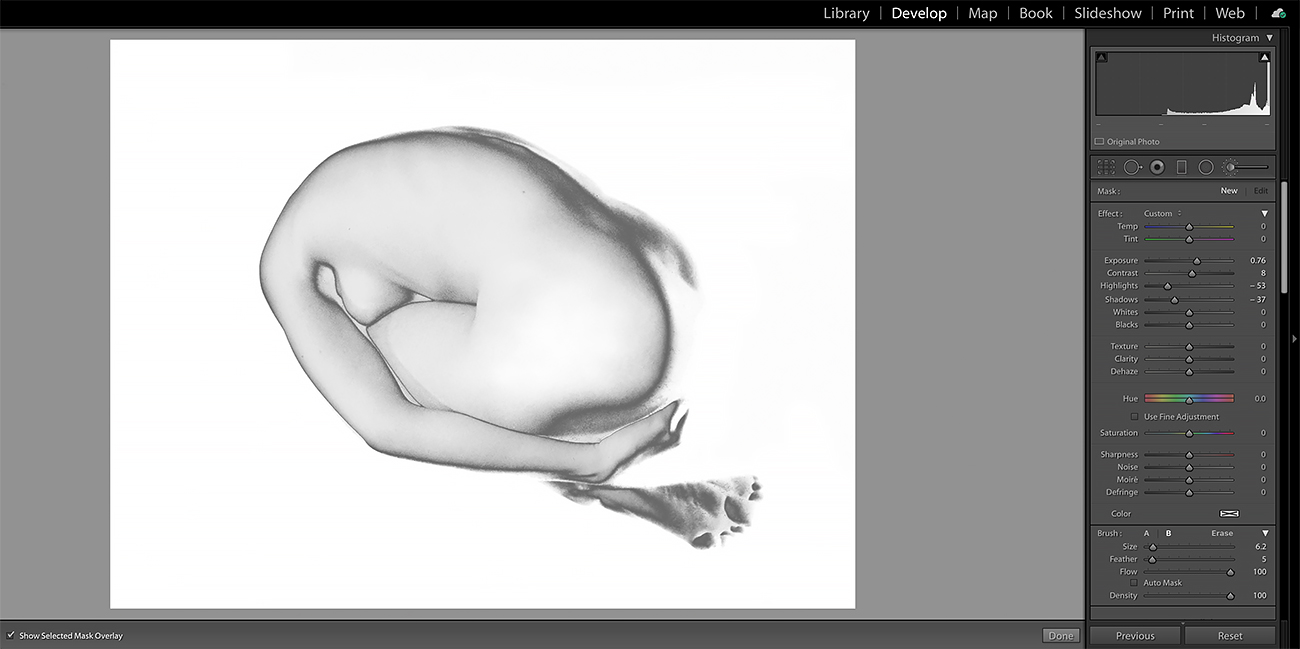
Now you can work on contrast/exposure/shadows etc
Et voilà, it's done!
With Photoshop
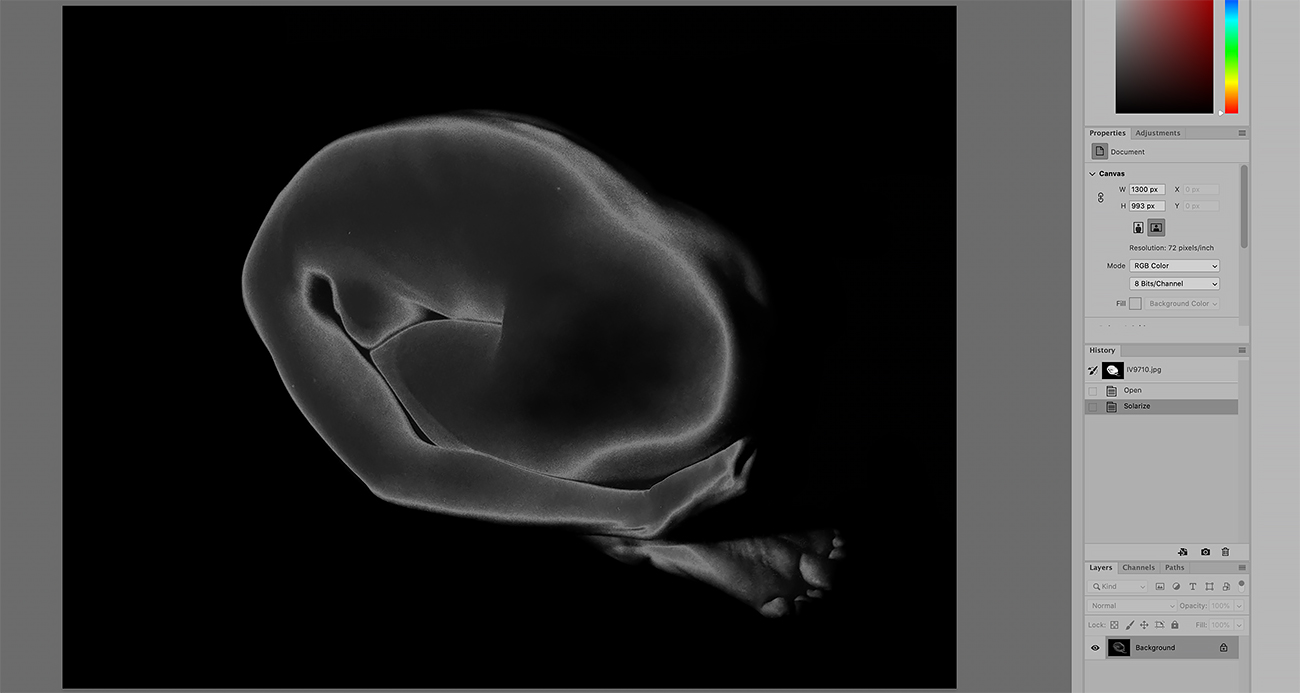
First of all if you want to use the tool Filter/Stylize/Solarize the result will be completely different has it is a solarization based on the solarization of a print and not a film like Man Ray used to do.
See the result using the Photoshop filter bellow.
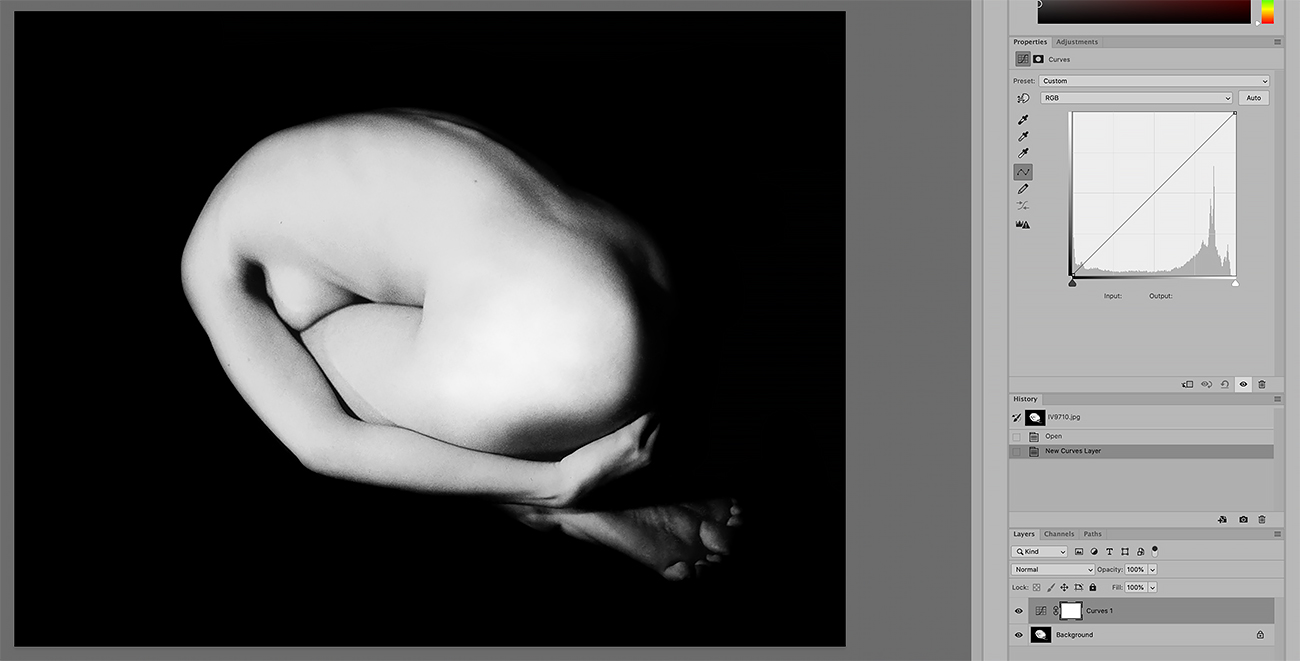
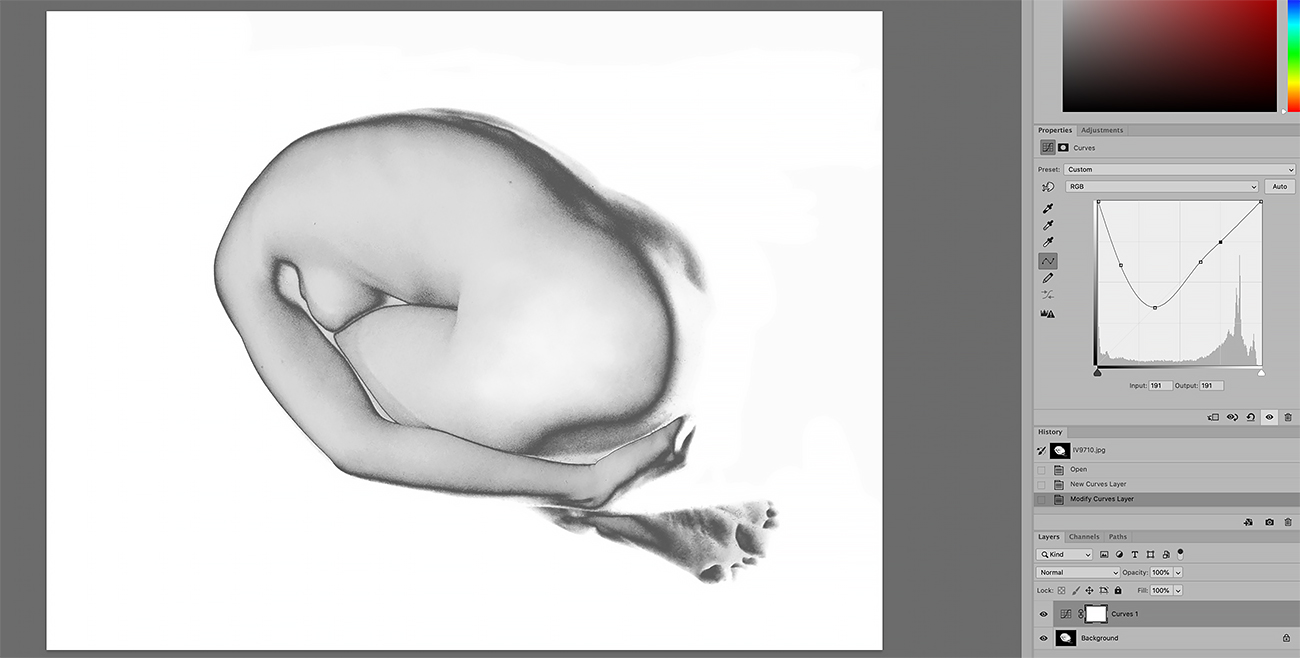
Apply Steps 1 to 5
You can do exactly the same in photoshop than in Lightroom. Use the Curves tool on the right hand side of your screen (depending of your setup)
In the sample bellow we also added a new curve point input value 35, outpout value 155
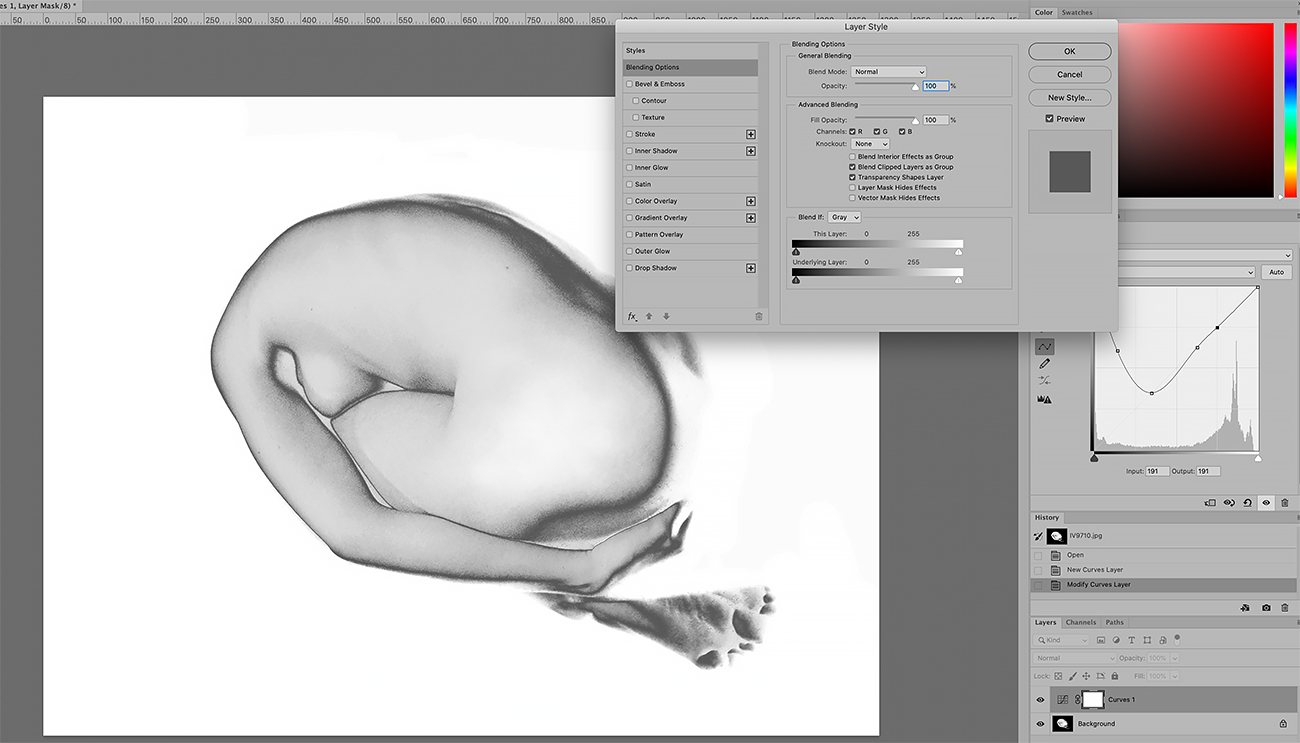
Work on the Layer Style
You can change the setup for your curves layer.
Go on the top left of your screen to Layers/the scroll down to Layer Style/ Then click on Blending Options...
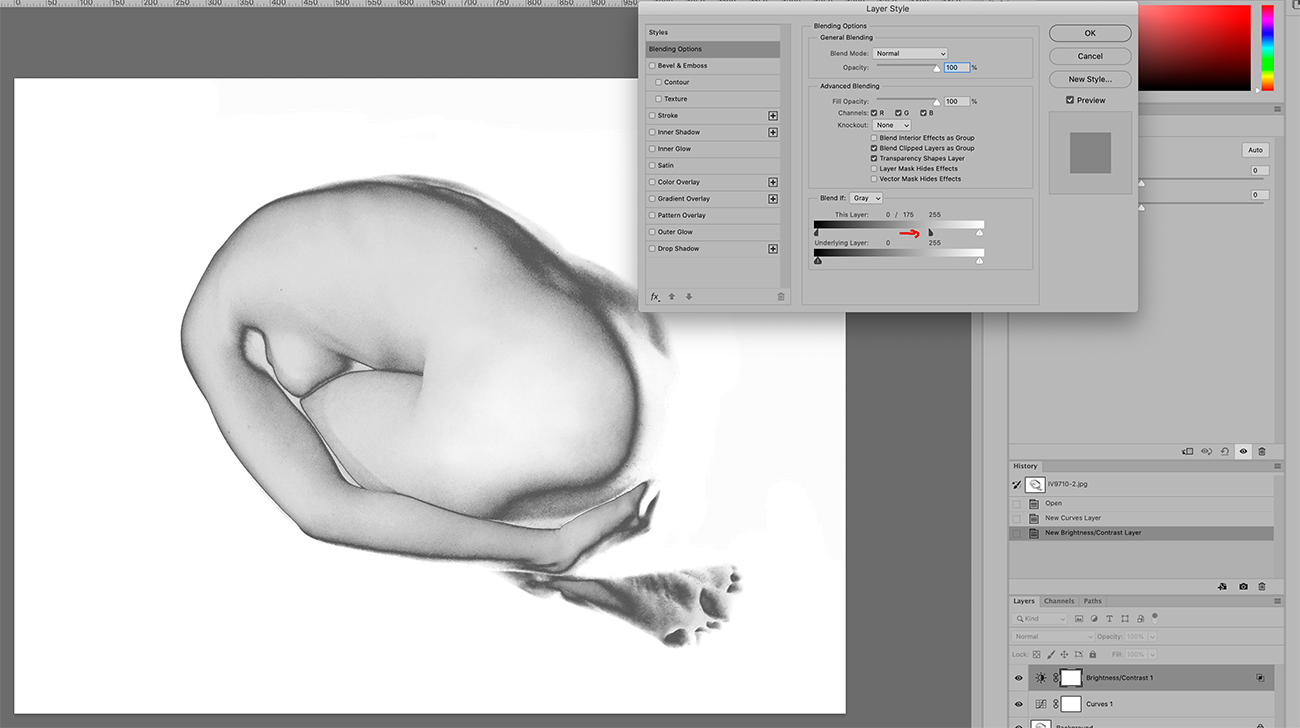
The tool will allow you to fine tune the grays of your solarized image. Move HALF of the top left cursor with your computer mouse while at the same time you press ALT (for Windows) or Option (For Mac Os). Do both at the same time. You will see that the cursor will be able to move. As you can see in the sample bellow the cursor was split in two parts.
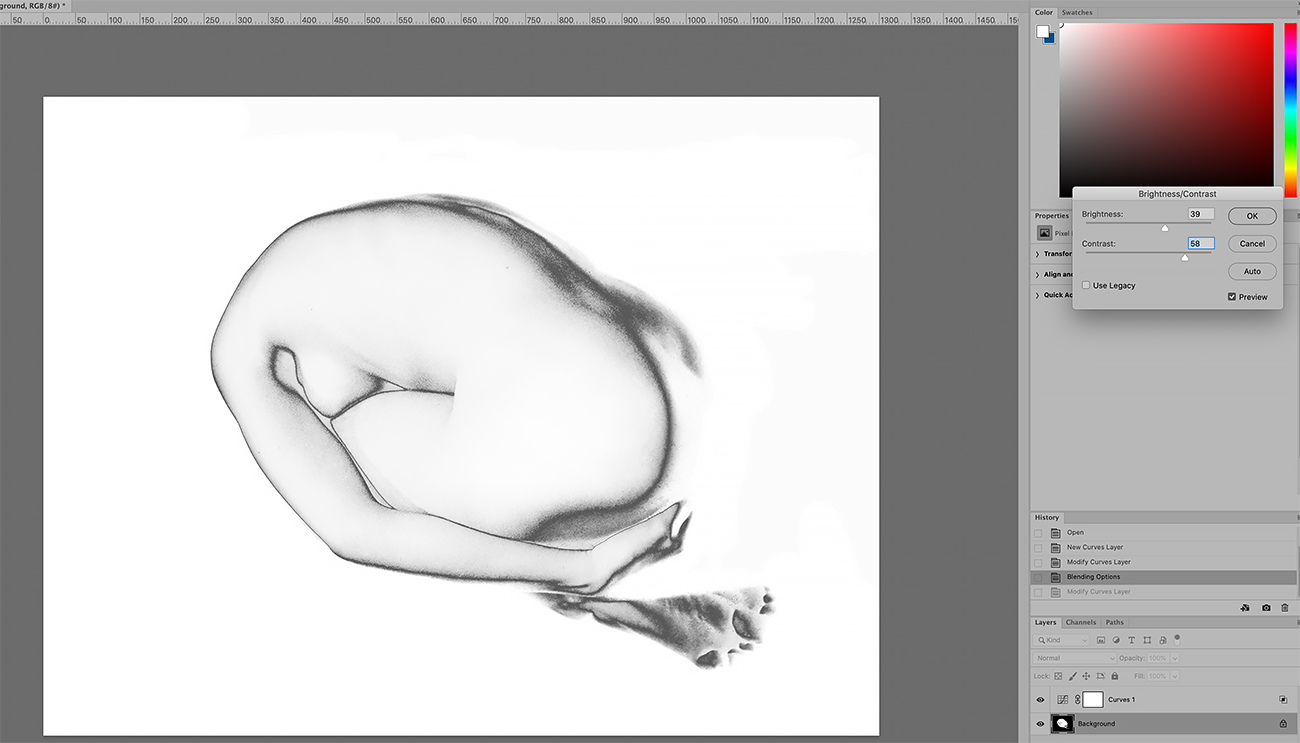
Adjust Brightness and Contrast


